- English
- Español
- Português
- русский
- Français
- 日本語
- Deutsch
- tiếng Việt
- Italiano
- Nederlands
- ภาษาไทย
- Polski
- 한국어
- Svenska
- magyar
- Malay
- বাংলা ভাষার
- Dansk
- Suomi
- हिन्दी
- Pilipino
- Türkçe
- Gaeilge
- العربية
- Indonesia
- Norsk
- تمل
- český
- ελληνικά
- український
- Javanese
- فارسی
- தமிழ்
- తెలుగు
- नेपाली
- Burmese
- български
- ລາວ
- Latine
- Қазақша
- Euskal
- Azərbaycan
- Slovenský jazyk
- Македонски
- Lietuvos
- Eesti Keel
- Română
- Slovenski
- मराठी
- Srpski језик

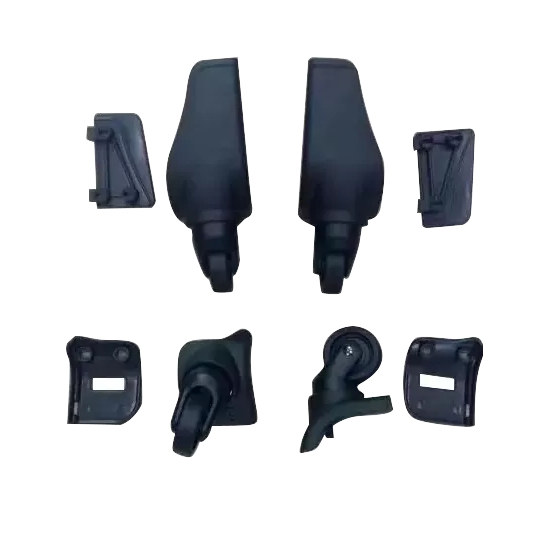
How to Replace a Broken Trolley Case Wheel?
The process of replacing the trolley case wheel, although the specific details may vary depending on the model of the suitcase, the basic steps are roughly the same.
Step 1: Preparation stage
First, clean the trolley case thoroughly to ensure that there is no dust or debris that will interfere with the replacement process. Next, place the trolley case upside down on a stable surface, which will prevent the case from sliding or tilting when changing the wheels and increase the stability of the operation.
Step 2: Remove the old wheel
Observe the fixing method of the trolley case wheel. Common fixing methods include screws and rivets. Depending on the specific situation, select the corresponding tool, such as a screwdriver or wrench, and gently loosen the fixing screws or rivets. Please note that different suitcases may use different fixing methods, so make sure to choose the correct tool for removal.
Step 3: Install the new wheel
Align the new trolley case wheel with the fixing hole on the bottom of the case, and then carefully put the wheel in place. Next, use a screwdriver or wrench to gently tighten the fixing screws or rivets to ensure that the wheel is firmly fixed to the trolley case. Please be careful not to use excessive force to avoid damaging the case or affecting the rotation effect of the wheel.
Step 4: Inspection and testing
After installing the new trolley case wheels, carefully check that all the fixing screws are tightened and gently turn the wheels by hand to test whether they rotate smoothly. If any problems are found, such as the wheels not turning smoothly or the screws are loose, please adjust or replace them immediately to ensure the normal use of the trolley case.